Mastering the Hook
Mastering the Hook
Cranker, boomer, power player – whatever you call it, the hook game is dominant in the sport of bowling. It has to do with physics when it comes to knocking down pins and more hook equals more pins.
Studies have shown that when a ball enters the pocket (the 1-2 pins for a left-handed player, 1-3 for a right-hander) the greater the angle (to a point), the better the pin carry. So mastering a hook release or multiple hook releases will increase your score potential.
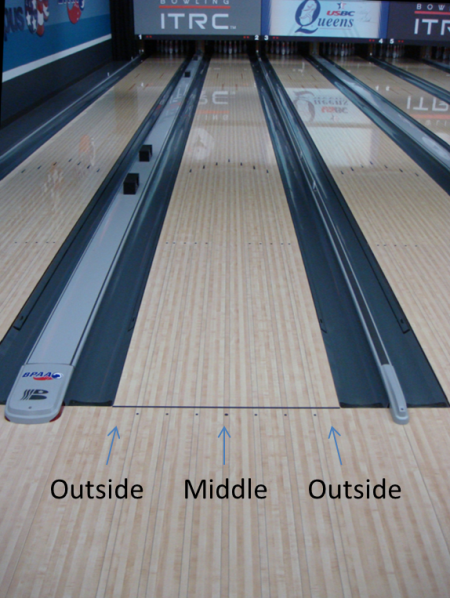
To control multiple types of hook on the ball, you first need to have balance in the stance, throughout the approach, and especially during the release. Without having good balance at the finish, consistency with the release will be difficult. To master multiple hook releases, learn to finish in a balanced position on different parts of the approach, i.e. close to the gutters, and in the middle. We’ll explain why in a bit.

Learn to slide everywhere to master the hook
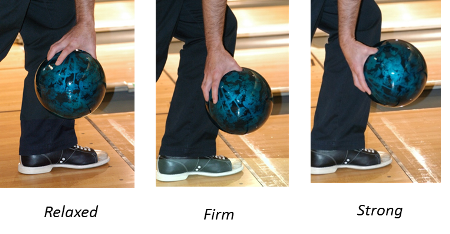
Now that you’re comfortable sliding in different areas of the approach, it’s time to learn about hand positions. Different hand positions at the release will produce different types of hook. The basics include a relaxed, firm, or strong wrist position. (picture below updated for better accuracy)

These hand positions produce different amounts of hook:
- Relaxed – Straighter ball path, least hook, less revolutions
- Firm – Arching ball path, medium hook, medium revolutions
- Strong – Angular ball path, most hook, more revolutions.
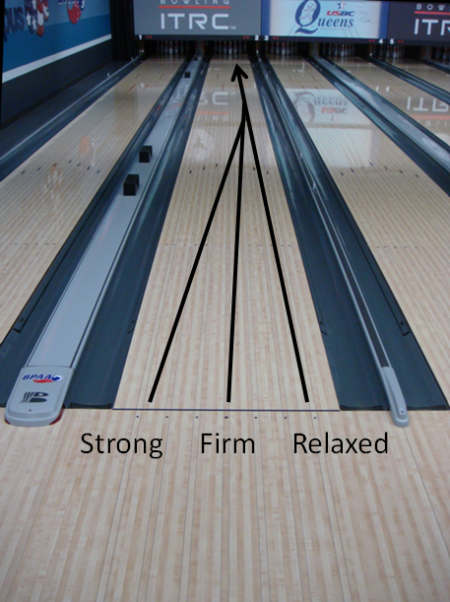
To accommodate each hand position, a bowler needs to slide in a different part of the approach to allow the ball path to work on the lane. It’s really pretty simple – if I’m using a relaxed hand position and the ball path is straighter, I should be toward the outside part of the lane (right side for right-handed bowlers, left side for left-handed bowlers) to let the small hook go to the pocket. If I’m using a firm wrist position, I should be sliding closer to the middle of the approach, and if I’m using a strong hand position I’ll need to move even further when sliding. Once again, the ball shape matches the layout of the lane where I’m sliding.
Take a look at the following picture and see if things make a bit more sense.

Wrist positions can change where you need to slide and the shape of the hook.
Put it All Together
To add one more element that will help with these hand positions and mastering the art of the hook ball, you should keep in mind that if we’re expecting the ball to hook more, we need it to be on the lane longer to do so. Here’s what we mean: a straight ball goes faster down the lane than a hook ball and if the wrist is doing more to create the hook (“strong position”) then the tempo of our footwork should help.
When using a relaxed hand position and playing the outside part of the lane, keep your footwork quicker. When using a firm hand position and playing the middle part of the lane, keep your footwork at a medium pace. And, of course, when using a strong hand position and playing more overall hook, keep your footwork slow.
Use these combinations of hand position, slide area, and foot speed to learn to master the art of the hook and control your game in any environment.


